Cheerful Hospital Quilt
Disclosure: This site contains affiliate links. As an Amazon Associate, I earn from qualifying purchases. Clicking on links, and purchasing products, may result in the seller paying us compensation - at no extra cost to you. Affiliate links are in green.
Also see:
Articles & Tips
Manage Limited Space
Easy Sewing Projects
Holiday Sewing & Crafts
“Woven” Hospital Quilt
Quilt Size
46.5" x 46.5"
The quilt is made up of forty-nine 6" blocks, plus a 2" border on all four sides.
This is a wonderful pattern for beginners. 6" blocks plus borders are all that is needed to create this very easy-to-make quilt. The pattern uses three different fabrics to create a look that resembles a weave. 49 blocks make up the quilt - 7 rows of 7 blocks (squares).
Use this quilt on a hospital bed for added warmth and cheer, or as a lap quilt when sitting in chairs or wheelchairs. It is perfect for a hospital bed due to its size. It covers the legs, but doesn't come up too high on the bed. I made a quilt for a friend while she was in the hospital, and it added cheer and color to her room. I made a second quilt to drape over a day bed in my guest room.
Finished Quilt Sizes
This series of quilts are all made the same, with 3 different fabric blocks that create a “weave” look. The different sizes are created by varying the size or number of the quilt blocks, or adding a border.
The baby quilt measures 28.5" x 28.5", and is made up of 4" blocks.
The lap quilt is made the same as the baby size, but measures 42.5" x 42.5" because it is made up of 6" blocks, rather than 4” blocks.
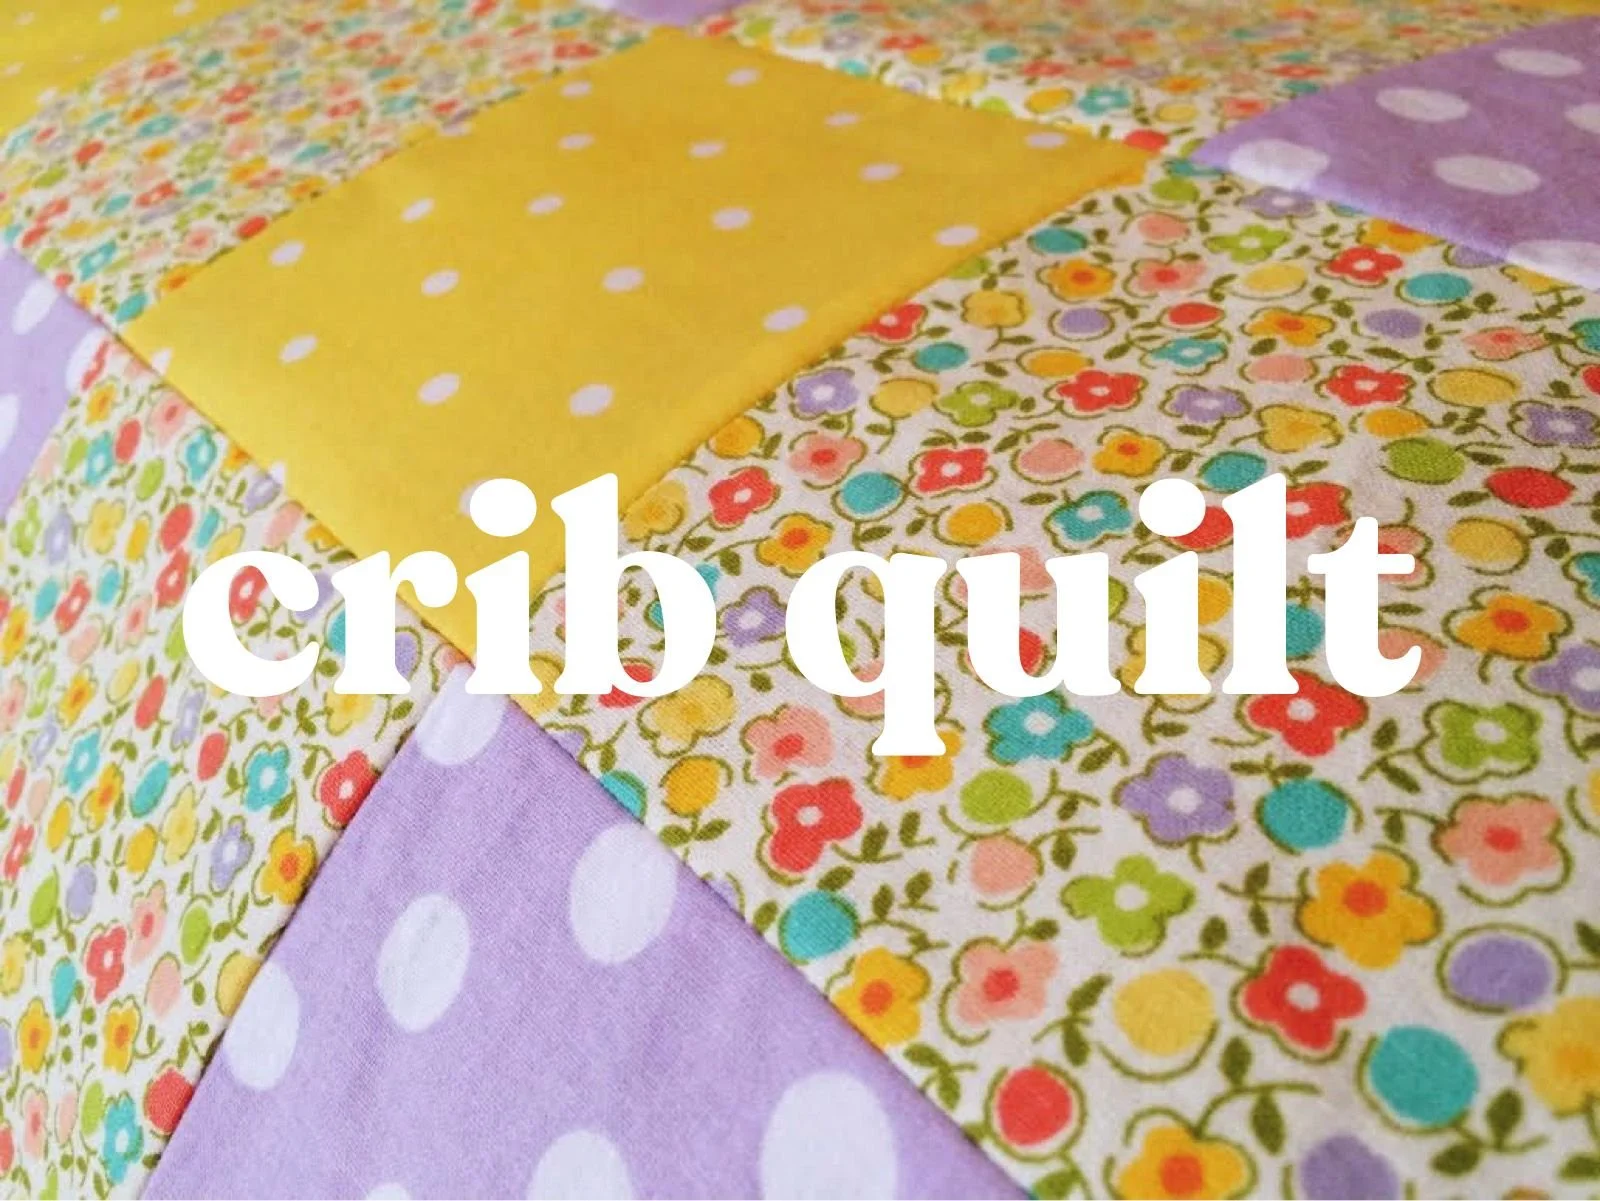
The crib quilt measures 28.5" x 52.5". Like the crib quilt, it is made from 4" blocks, but it contains six additional rows. The baby quilt is shown on right (7 rows of 7 blocks).
Hospital Quilt measures 46.5" x 46.5", and is made up of 6" blocks plus a 2” border on all four sides..

Basic Layout
The following image shows my quilt after all blocks were stitched together, and the border had been added. After this photo was taken I assembled my quilt, then added binding that I cut from the green print.
Supplies
CUTTING TOOLS
I recommend using a Rotary Cutter, Cutting Mat and Sewing Ruler. I use these tools for most projects. They allow for easy, precise cutting. Visit my Amazon store page to purchase these tools, fusible fleece, insul-bright, heat resistant cloth, quilting pins, and other items I use in my projects.
FABRIC - refer to photos after fabric supplies
NOTE: I list fabric width as 42" - 44" because that is a common width for quilt fabric. You will need (after shrinkage) a width of at least 36".
Color One (blue print): 1 yard of 42-45" fabric
(for 25 squares)
Color Two (yellow): 3/4 yard of 42-45" fabric
(for 12 squares)
Color Three (green): 3/4 yard of 42-45" fabric
(for 12 squares)


Binding: Cut binding either 1.5" wide or 2" wide (your preference), and long enough to go all the way around your quilt - about 200 inches. Binding can be made from scrap fabric, or it can be purchased.
Go to: Quilt Lesson: Continuous Bias Binding to learn how to make your own binding.
Batting: You will need a 46.5" x 46.5" piece of batting (cut larger; then trim later to fit).
Quilt Backing: 46.5" x 46.5" piece of fabric for the quilt back (cut larger; then trim later to fit).
Refer to Quilt Lessons for instructions on assembling and layering, backing, and binding.
BUY EXTRA & PREWASH FABRIC: You will need the full amounts, so buy a bit extra fabric. Wash and dry the fabric before use.
OTHER SUPPLIES
Thread (to match background)
Ribbon or lace, etc. for trim
General Sewing Supplies: scissors, quilting pins, large sewing ruler, fabric marking pencils, seam ripper
hint: quilting pins are easier to use than regular pins; a tupperware box works well as a supply box.
Safety Reminders For Little Helpers
A. Always have an adult do all the ironing!
B. Never run with scissors. Carry them pointed end down.
C. Never use a sewing machine without adult supervision.
D. Always let an adult use the seam ripper for you.
INSTRUCTIONS
Note: all seams are 1/4 inch. Always iron between steps.
Cutting Instructions
Note: the following photo shows fabric from a different woven quilt project.
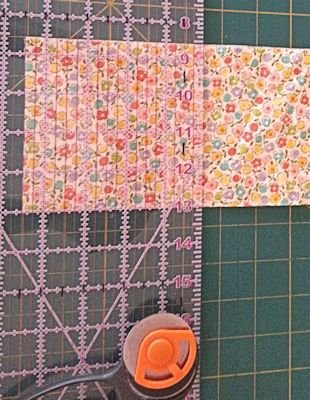
All strips of fabric will be cut 6.5" x w.o.f. (width of fabric). I cut my strips using a large sewing ruler and a rotary cutter. To make it go more quickly, I fold the fabric in half, lining up selvages, before cutting. When I computed fabric yardage, I assumed you could get at least 6 blocks per strip. Your pre-shrunk fabric would need to be at least 36" wide (6x6.5=39).
For colors two and three, cut three strips of fabric 6.5" x w.o.f.
Cut all strips into 6.5” squares. For color one, you will need a total of 25 squares (blocks). For colors two and three you will need a total of 12 squares of each color.
Note: the photo shows the ruler at 4.5”. That was for a different project. For this project, the squares are all 6.5”.
Borders
From color one, cut four squares, each measuring 2.5" x 2.5".
From color two: cut 3 strips, each 2.5" x w.o.f. Cut strips into pieces that measure 2.5" x 6.5". You will need 14 pieces.
From color three: cut 3 strips, each 2.5" x w.o.f. Cut strips into pieces that measure 2.5" x 6.5". You will need 14 pieces.
Sewing Instructions
use 1/4" seam allowance
Iron between each step. Read through all directions completely before beginning.
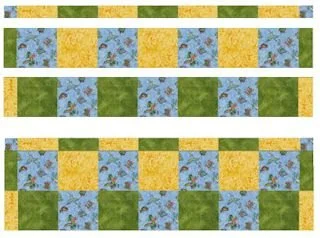
Using 1/4" seam allowances, sew the squares together as shown below. The top three rows show the rows before they are stitched together; the lower section shows the rows stitched together.
It is easiest to assemble the squares into one row at a time. You can create horizontal or vertical rows. We show the top three horizontal rows below. Follow the image at the top of this page to complete the remaining rows. After your rows are created, sew the rows together. TIP: Iron all squares before sewing them into rows. Iron the rows before sewing them together. It works best to press the seams in opposite directions. In other words, if row one has seams pressed to the left, press the seams of row two to the right. That way, when you sew the rows together, it is easier to match corners more precisely.
Layering / Quilting

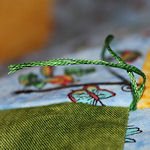
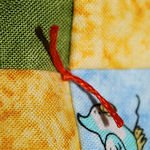
You can now stitch the three layers together. Lay down the backing, right side down. Then lay down the batting. Then lay down the top layer, right side up. The lower layers might extend beyond the sides of the top layer if they were cut a bit larger. That's fine; lower layers can be trimmed after the layers are stitched together. Baste the layers together, using pins or basting stitches. Place pins fairly close together. I pin where corners come together, and around outside edges. Then hand or machine baste around the outer edge, stitching all three layers together around all four sides. Trim the basting and backing to fit the top layer. The following photo shows the top layer with the lower layers showing on the sides (I pulled them to the side for the photo). When all layers are basted together, you are ready to hand quilt, machine quilt or tie layers. I chose to tie the layers together using embroidery floss.
Refer to Quilt Lessons for for additional instructions on assembling and layering quilt blocks, binding, and backing.
Note: Flannel Backing
For the backing, I recommend a nice, soft flannel for a hospital bed. It will help keep the quilt from sliding off the bed, and it will be comfortable for the patient. I also used a flannel for the binding.
My flannel was not wide enough to use for backing. I pieced it across one end. This worked fine in my opinion; the seam is hardly noticeable.
More Quilt Patterns
More Quilting


Adorable doll quilt or quilt block. Prairie girl enjoying her garden along with her dog.