|
|
|
|
| HOME SEW CRAFTS DECOR SHOP |
|
SNIP-IT REVERSE APPLIQUE
Haystack Rock - Cannon Beach |
| lessons holiday patterns sewing patterns |
|
Snip-it is actually another term for reverse applique. It is the art of layering fabric, and then cutting away parts of layers to create images. Stitching is done around the areas to be cut out. This holds all of the layers in place. This is a fun project to do. Please read Introduction To Reverse Applique. |
 Snip-It Applique
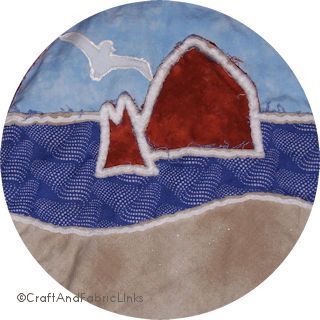
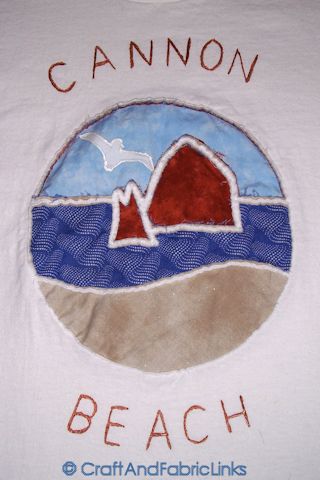
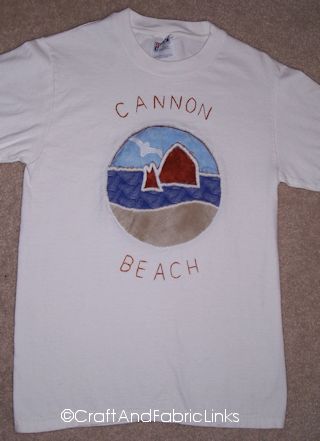
Reverse Applique: Haystack RockDesigner: Christina Sherrod Cannon Beach is one of my all time favorite places. I grew up along the Oregon coast, and spent hours climbing around Haystack Rock. My daughter and I created this tee shirt to remember our fun times there. |
Supplies
Fabric:
One square piece EACH of four different fabrics (in the size required for your project - if using my pattern, each square must be large enough to cover the entire pattern) PLUS a small square of white fabric for the seagull.
Draw cutting lines that are 1/4" INSIDE the outer edge of the small hearts (I have drawn the line for you on the large heart). Trace over your pattern with a heavy, black marker. Other |


|
|
 tee shirt (or item of your choice)
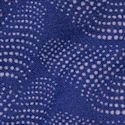
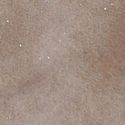
Directions1. Cut / Layer Squares Of FabricThink carefully about the order of the layers. You will be cutting through layers of fabric to reveal a layer that is underneath. Use very sharp scissors, and be very careful to not cut a layer you do not wish to cut. You will be cutting through all layers down to the layer you need to leave showing, so it will work no matter how you layer, but you may wish to layer in a certain order. For example, if your design contains a large area of one color, you might want that layer to be on top. That way, you do not have to cut so much. However, darker colors of fabric can show through lighter colors, so perhaps you will want your darkest color to be the top layer. That is what I did. I layered as sky, rock, water, and sand on top - all facing up. Write down the order of layers! Layer your fabrics RIGHT SIDE UP. Hand or machine baste the layers together around the outer edge, close to the edge. |
2. Transfer DesignTransfer my pattern to your tee shirt front. You can do this by making several copies of the pattern, cutting the pieces out (one copy for each layer) and tracing around the piece, using a fabric marker OR use fabric transfer paper. If your tee shirt is white, you will need to use a light colored marker. |
4. Stitch Layers To Underside Of Tee ShirtPlace your fabric layered square (right side up) UNDER the front of the tee shirt (shirt is right side out), making sure that the fabric layers contain the entire pattern area. Pin in place, around the outer areas of the square. Do not stitch at this time. DO NOT stitch through both layers of the tee shirt! You will need to use the free arm of your sewing machine. If you do not have one, you will need to hand stitch. It will also be helpful to use stabilizer. Please read Machine Embroidery Lesson for more information on using a stabilizer. |
3. Stitch And CutFollowing the pattern lines, stitch around the outer circle, and along all lines on the pattern. Refer to the red lines in my sketch. I free hand drew the red lines so they are not entirely straight, but you get the idea. The red stitch lines and blue cut lines represent the FRONT (right side) of the tee shirt. The red lines represent the stitch lines. The blue lines represent the cutting lines. Cutting is done outside the stitch line and never through a line.
For the sky: the tee shirt fabric, sand fabric, water fabric, and rock fabric all had to be cut away. You may want to cut only one layer at a time. I had to be very careful to not cut into the sky fabric. |
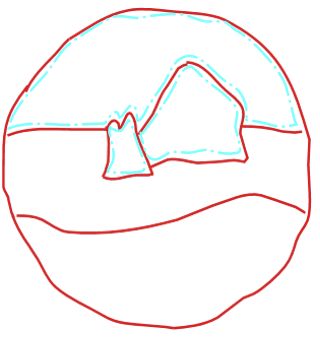 Cut the tee shirt fabric along the cutting lines (the sky and rock cutting lines are shown in blue). Use scissors with short, very sharp blades. You will be "snipping" the fabric. Fiskars makes very nice "snippers". I could not do my work without them.
|
When finished with snipping, I also trimmed away the excess fabric on the INSIDE of the shirt. I hand embroidered the words "Cannon Beach" onto the front of the shirt.
For instructions on using fusible web, go to: Fusible Web / Applique Pressing Sheet Instructions |
 FINISHING
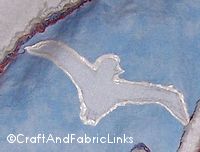 I also attached the seagull. For that, I cut out a seagull shape from white fabric. I used Heat N Bond Lite to attach the seagull to the sky. I then outlined the seagull with fabric paint.
Related Topics
Machine Embroidery
|
Quick Reference |
Learn To Paint!free video tutorialsVisit my youtube channel. Free videos with step by step instructions. Paint beautiful paintings for your home. |

Please ShareI rely on advertising to keep my site free. Please share with friends. |
Privacy Policy & Terms Of UseBy using our website, you expressly consent to our Privacy Policy and Terms & Conditions. All Patterns, images and instructions are copyright protected. |