|
|
|
|
| HOME SEW CRAFTS DECOR SHOP |
|
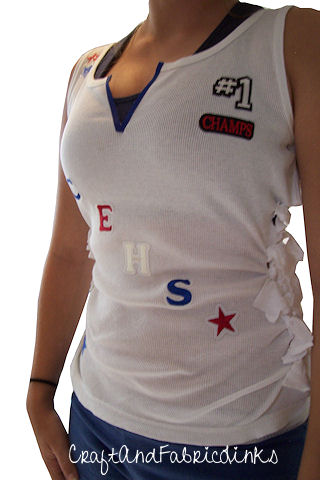
SCHOOL SPIRIT APPLIQUE
Side Fringe Tee |
| lessons holiday patterns craft patterns |

|
|
No-Sew Appliqueturn graphics into custom appliquepage 1 of 2Create a design on your computer. Print the design to applique transfer paper. Iron the design to clothing. Add a stylish, trimmed "v" neck and side ties. That's it! Quick and easy. No sewing required. If you prefer, you can use ready made appliques for this project. For this project, I used a mix of ready-made applique and computer printed applique transfers. Also see: |
 Designer: Kayla Sherrod
Create Custom Applique - School Spirit ShirtDesigner: Kayla Sherrod Turn a regular sleeveless tee shirt into a v-neck with side fringe ties. Create a design on your computer. Print the design to applique transfer paper. Iron the design to clothing. Add a stylish, trimmed "v" neck and side ties. That's it! Quick and easy. No sewing required.
Also see:
|
About This Project
Letters can be ready made appliques, or cut from fabric and ironed on using fusible web, or printed from your computer. Our instructions explain all of these methods. |
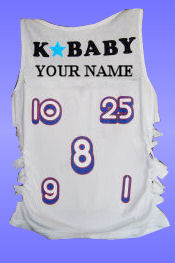 I used a regular, sleeveless round neck tee shirt. I cut a "v" in the front, and trimmed the raw edges with ribbon. I cut slits in the sides
to create ties. This created a more fitted, "fun" look. The stars were ready made appliques; the numbers were created on a computer and printed to transfer
paper, then ironed to the back of my shirt.
I used a regular, sleeveless round neck tee shirt. I cut a "v" in the front, and trimmed the raw edges with ribbon. I cut slits in the sides
to create ties. This created a more fitted, "fun" look. The stars were ready made appliques; the numbers were created on a computer and printed to transfer
paper, then ironed to the back of my shirt.
Project Supplies
APPLIQUE
Method 2: Create Custom Applique Using A Pressing Sheet
Method 3: Create Custom Applique Using A Pressing Sheet
Method 4: Create Your Own Design On Your Computer
Method 5: Design Your Own Fabric |
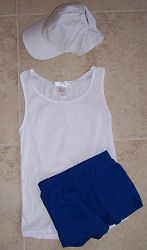 SHIRT
SHIRT|
OTHER Sewing Supplies
thread
|
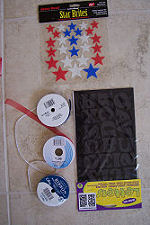 APPLIQUE SUPPLIES
Continue to go to page 2 for directions |
Quick Reference |
Learn To Paint!free video tutorialsVisit my youtube channel. Free videos with step by step instructions. Paint beautiful paintings for your home. |

Please ShareI rely on advertising to keep my site free. Please share with friends. |
Privacy Policy & Terms Of UseBy using our website, you expressly consent to our Privacy Policy and Terms & Conditions. All Patterns, images and instructions are copyright protected. |