Christmas Stocking
Download My Free Pattern
I provide a printable pattern for the basic stocking. Use full fabric pieces for the front, back and lining OR piece fabrics to create the exterior fabric. I include instructions for making the tree triangles.
Customize: Use contrast fabric for the top. Add embroidery, applique, buttons, crochet, lace, ribbon, or other embellishment.
Stocking Size
The finished stocking size is approximately 20" x 12". Customize size by enlarging or shrinking pattern.
Click photos for larger view.
SUPPLIES - makes 4 stockings
Fabric
1 yard of fabric for stocking fronts (you need four 14" x 22" pieces of fabric, so you can use 4 fat quarters)
1 yard of fabric for stocking backs (or four fat quarters)
NOTE: if using same fabric for front and back, you will need 2 yards of fabric
2 yards lining fabric
2 yards fusible fleece
3" length of 1/8" or 1/4" ribbon per stocking (for stocking hangers)
embellishments
scraps of fabric for "patches", letter applique or trees (optional)
Christmas Stocking Pattern
Print all 4 pattern pieces. Each fits to one 8.5” x 11” piece of paper.
NOTE: The patterns say CraftAndFabricLinks.com. That was the name of my previous site. These are pdf files.
Sewing Supplies
thread
sewing scissors
quilting pins
large sewing ruler
fabric marking pencils
seam ripper
rotary cutter and mat (optional but nice)
PRE-WASH, DRY, & PRESS ALL FABRIC BEFORE USING

See all of our free Christmas sewing and craft projects.
Connect Pattern Pieces
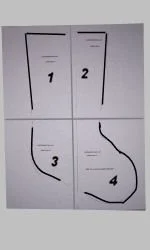
Lay out the pattern pieces as shown in the photo. Tape the four pages together. Connect & smooth the pattern lines where necessary.
It should be approximately 20" x 12". Adjust the size to fit your needs.
NOTE: Add 1/4" extra seam allowance around the two sides and foot. Do not add a seam allowance to the top.
DIRECTIONS
All seams are 1/4”
1. Cut All Stocking Front Pieces
Use the pattern to cut out 4 stocking fronts, four linings, and four pieces of fusible fleece. If you wish to use a contrast fabric at the top, or add a row of trees, cut the pattern into pieces (wherever you wish to splice in a row) and add 1/4" seam allowance to the top and bottom of each pattern piece's cut edges.
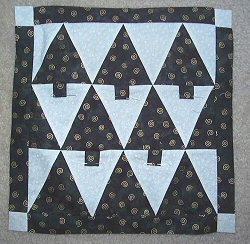
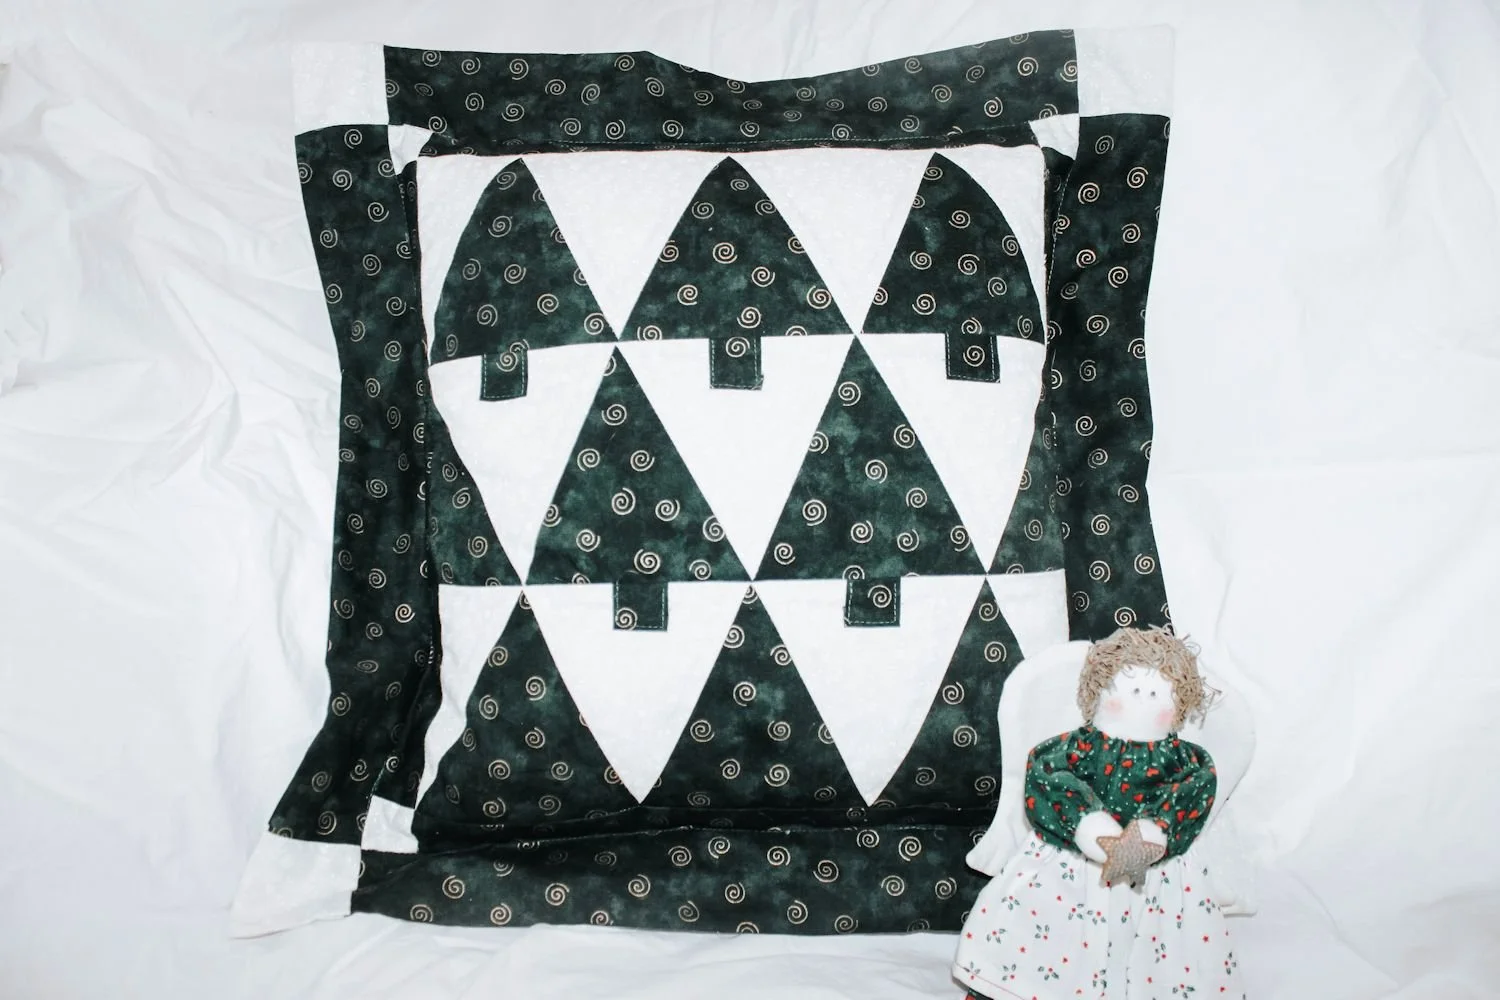
TREES:
If you wish to add a Christmas tree row, go to my Christmas tree pillow pattern for directions on making triangle trees.
2. Cut All Stocking Back Pieces
FLIP THE PATTERN OVER. Use the flipped pattern to cut out 4 stocking backs, four linings and four pieces of fusible fleece. THE BACKS ARE OPPOSITES OF THE FRONTS.
You will now have 4 stocking fronts (with lining and fleece pieces) and four stocking backs (with lining and fleece pieces.
Note that the backs are cut opposite to the fronts. Refer to the following diagrams. Fabrics are all shown right side up.
The cut pieces shown below will make ONE stocking.


3. Create Fronts

Lay out the four stocking fronts, wrong side up. Trim 1/4" off the top of each fusible fleece stocking piece. Pin a fusible fleece piece to each stocking front, adhesive side down, so that the fusible fleece piece is lined up with the lower stocking edges (top 1/4" of stocking fabric does not have fusible fleece). Turn pieces over and iron. Fusible fleece will adhere to wrong side of stocking fronts.
4. Create Backs
Repeat step 3, using stocking backs.
You now have four stocking fronts with fusible fleece on wrong side, and four stocking backs with fusible fleece on wrong side.
5. Add Lining
Lay out all pieces (fronts and backs), right side up. Place a lining piece over each piece (lining is against right side of stocking fronts and stocking backs). Stitch around all sides EXCEPT top, using 1/4" seam.
Turn front pieces right side out. Use turning tool or blunt end of crochet hook or similar object to help push out seams. Press. Top will be open. Repeat with back pieces.
Turn under upper raw edges of front pieces, all the way around, and press. Pin top opening closed. Top stitch across top, closing opening.
You now have four front pieces and four back pieces, finished all the way around.
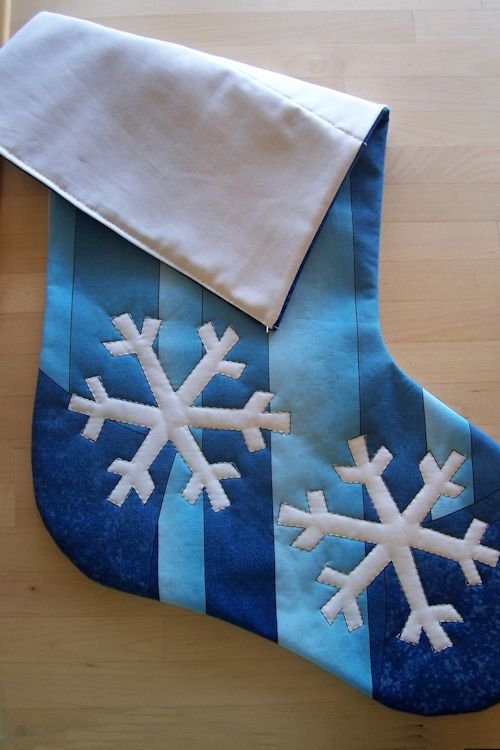
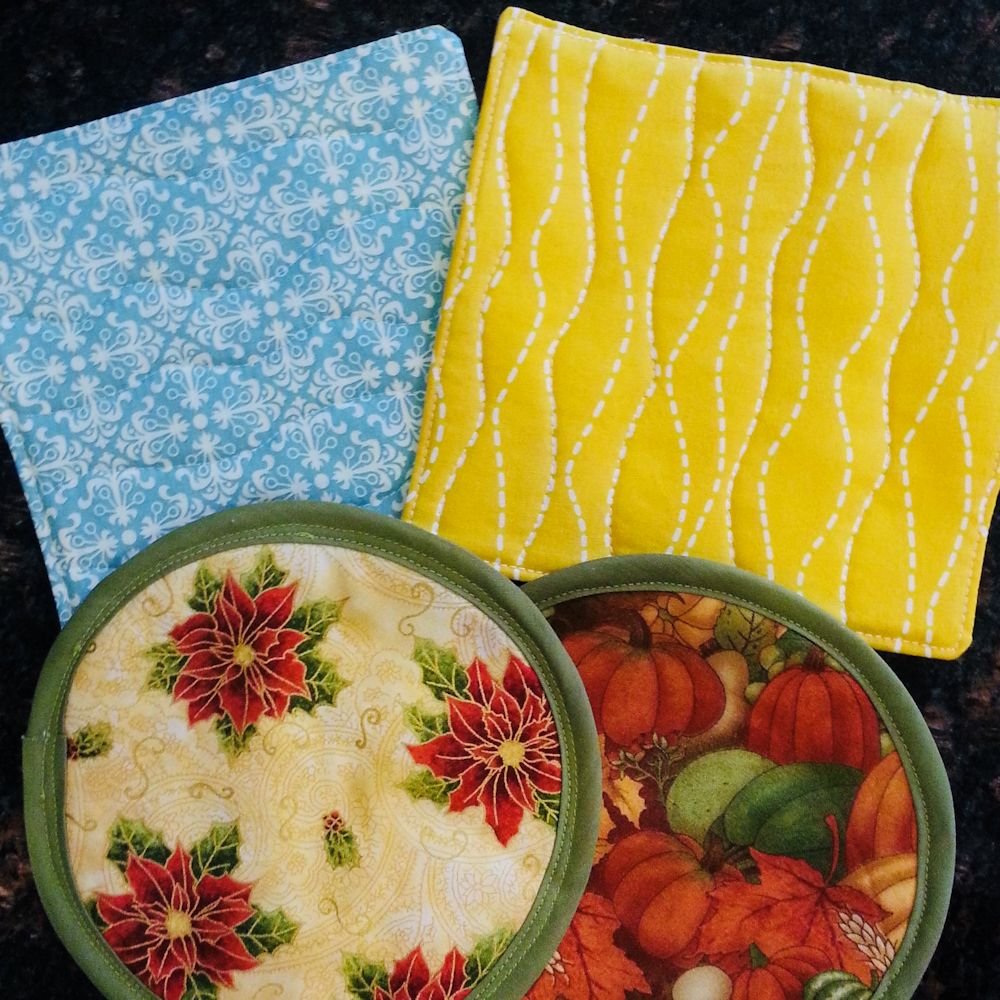
The following photo shows one finished front piece. The front fabric is blue with snowflakes; the lining is white. The front piece is finished nicely all the way around. It is not yet stitched to the stocking back. I quilted the snowflakes at this point.

6. Attach Hanging Loop
For each stocking: fold a 3" piece of ribbon in half and place it so that the raw edges line up with the outer edges of the front stocking piece. The loop will point up toward the upper straight edge of the stocking. Pin ribbon in place.
7. Assemble The Stocking
NOTE: If you wish to do any quilting, do so before stitching the stocking backs to the stocking fronts.
Lay out all four finished front pieces, right side up. Place finished back pieces over front pieces, right side down. Stitch fronts to backs, right sides together, catching ribbon in seam (stitch long sides, heel and toe - leave top edge open), using 1/4" seam. Turn each stocking right side out. My finished stocking has blue fabric with snowflakes on the front, and a multi-print fabric on the back.


Success! But more adventure than we had bargained for.
More Christmas Patterns


Find Inspiration!


Crocheted basket with handles. Quick and easy with bulky yarn.