Christmas Pillow

Disclosure: This site contains affiliate links. As an Amazon Associate, I earn from qualifying purchases. Clicking on links, and purchasing products, may result in the seller paying us compensation - at no extra cost to you. Affiliate links are in green.
Also see:
Articles and Tips
Organizing Tips & Projects
Quilt Lessons
Pillow & Pillowcase Patterns
Triangle Blocks and Points
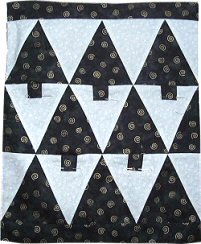
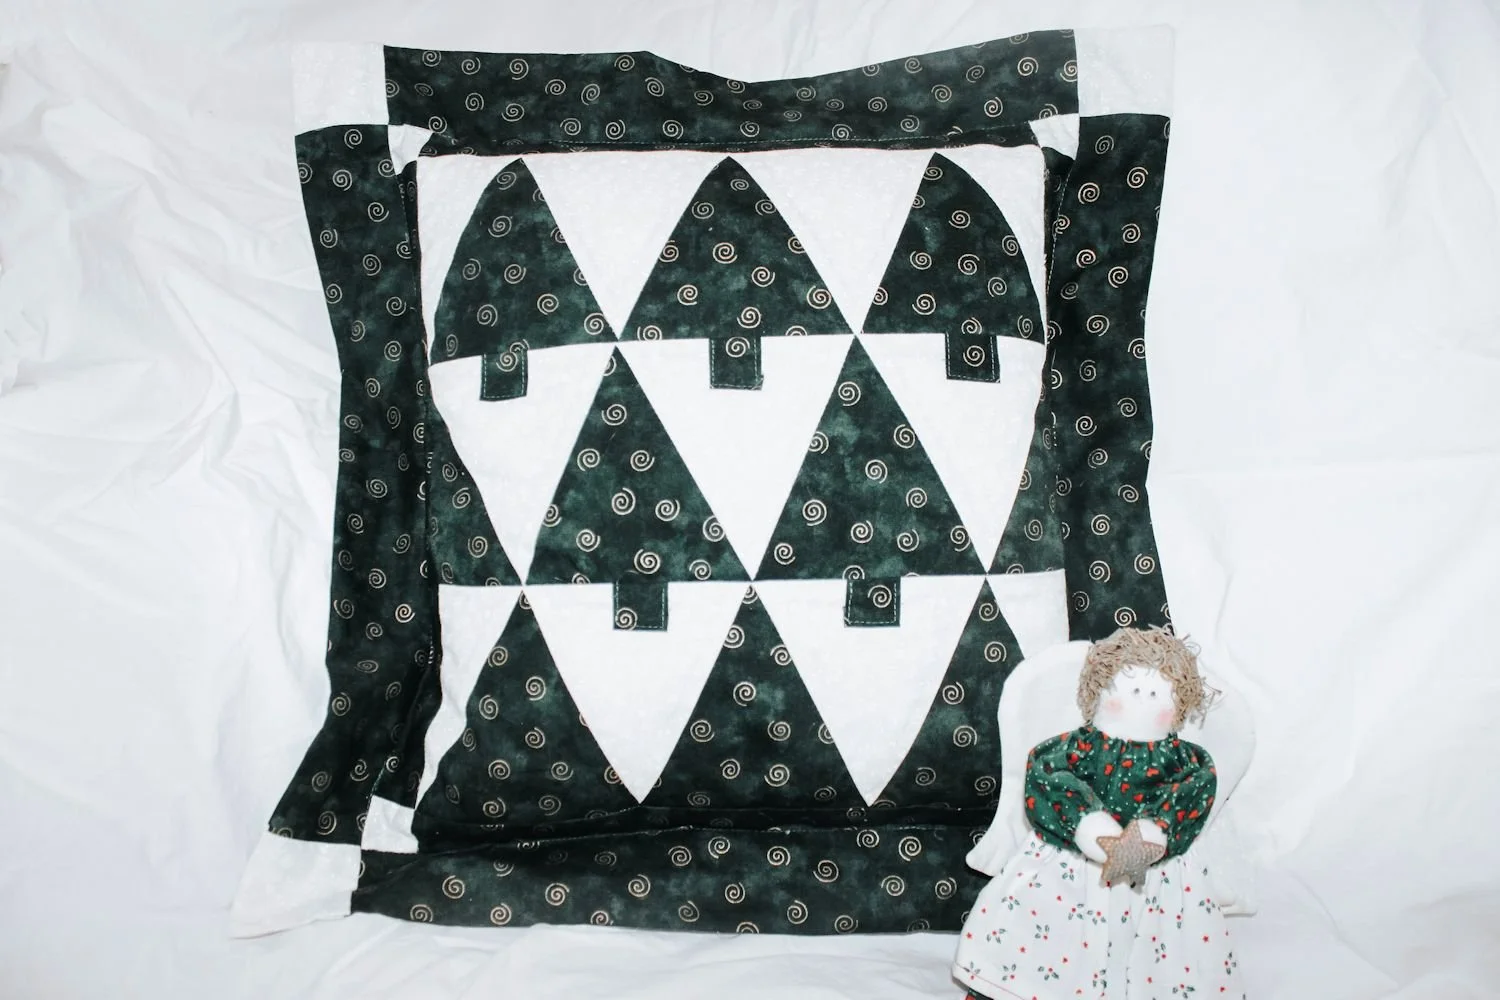
Practice points while making this wonderful Christmas tree pillow. The tree features a decorative flange (flat ruffle), and a back envelope opening. The face of the pillow is made from one 14.5” Christmas Tree Block - featured in this tutorial.
You could also create a beautiful pillow using the bear paw block, or any 14.5” quilt block.
Christmas Tree Quilt Block
There is nothing more fun than creating special holiday memories. Include your children or grand-children when choosing fabrics and trims; they'll love to have their own holiday pillow for their bedroom! Make it elegant, modern, or country casual through your choice of fabrics and trim. Applique tree decorations; add lace, ribbon, buttons, etc. My tree pillow is made of a dark green fabric with beautiful gold metallic accent; the photographs do not do justice to the colors.
PILLOW SIZE
The finished pillow cover measures 14" x 14" plus flange. It will fit a 14" square pillow. Without the flange, the block measures 14.5" square (including 1/4" seam allowances on all edges).
SUPPLIES - 1 Pillow
1/4 yd contrast fabric: (what I show as white background with holly in the diagrams, and ecru/white print in the photos) - this allows for shrinkage if your pre-wash your fabric. This is enough for triangles, pillow back and pillow "ruffle". If using lace for the ruffle, buy only 3/4 yd. of green fabric. NOTE: The ecru goes nicely with the gold swirls of the green print. The ecru print actually has tiny white leaves - they do not show well in the photo.
1 yd green fabric: (or fabric of choice for trees)
PATTERN PIECES
We provide the pattern pieces for the full tree, half tree, contrast triangles, half triangles, corner squares, and tree trunks. You must create the pattern for the border, ruffle and pillow back (instructions follow). Our patterns download as pdf files.
Trees and Tree Trunks
tree and trunk pattern: the small square is for the tree trunk and the small corner squares used in the pillow front border.
IMPORTANT: if your pattern printed to the correct size, the base and height of the full triangle will be 5”. The full triangles will be cut from a 5” wide strip of fabric (see instructions below).
Flange (flat ruffle) Pattern:
The flange consists of rectangles and squares. Make two pattern pieces:
one 2.5" x 2.5" square: label it "square for flange"
one 2.5" x 14.5" rectangle: label it "long strip for flange"
NOTE: If you are using ready made ruffle (such as lace ruffle), rather than our fabric ruffle, cut the ruffle 65" long (total distance around the pillow is 14" x 4, or 56").
Pillow Back pattern:
You will need to create your own pattern piece for the pillow back and border around the pillow front (I use butcher paper bought on a roll at Costco to create my pattern pieces). The pillow front when finished should measure 14.5" x 14.5". The pillow back also measures 14.5 x 14.5. The back is made up of two pieces. Cut two pattern pieces as follows: Piece "A" measures 11.75" x 14.5"; piece "B" measures 8.25" x 14.5". Label your pieces.
Pillow front Border pattern:
Cut 1 pattern piece 1.5" x 12.5": label it "border".
Pillow Form: 14" pillow form
General Sewing Supplies
thread to match lace (or trim)
sewing scissors
quilting pins
large sewing ruler
fabric marking pencils
seam ripper
rotary cutter and mat (optional but nice - I use one with my sewing projects)
DIRECTIONS
All seams are 1/4”
Tip: Press after each step.
1. Cut Fabric Pieces
Using the pattern pieces we provided, cut out half triangles, triangles and tree trunks. Leave space on your fabric for the ruffle long pieces (you'll need 8), ruffle squares (you'll need 8) and pillow back pieces
NOTE: we provide a pattern piece to make one right half-triangle. Flip the pattern piece over to make one left half-triangle.
Green full triangles 8: cut 8
Contrast fabric full triangles: cut 7
Green right half-triangles: 1
Green left half-triangles: 1
Contrast fabric right half-triangle: 2
Contrast fabric left half-triangles: 2
Green flange pieces: 8 (each 2.5" x 14.5")
Green border pieces: 4 (each is a 1.5" x 12.5" strip)
Contrast fabric border corner squares: 4 (each 1.5" x 1.5" - you can use the tree trunk pattern)
Contrast fabric flange corner squares **: 4 (each 2.5" x 2.5")
* Cutting Tip Triangles: Cut a strip 5" x w.o.f. (width of fabric). Lay your pattern pieces on the strip and use a large sewing ruler and rotary cutter to cut your triangles and half triangles. OR use a large sewing ruler with rotary cutter to cut on the angle and omit the pattern piece.
** Cutting Tip Flange Pieces: Cut a strip 2.5" x w.o.f. Lay your flange 2.5" x 14.5" pattern on this strip and use a large sewing ruler and rotary cutter to cut your 8 ruffle pieces (you will need two 2.5" strips). If you know how to use a sewing ruler and rotary cutter to measure and cut you can omit the pattern piece.

cut triangles
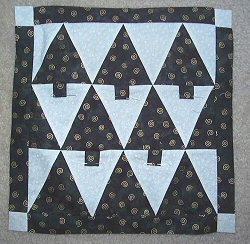
2. Organize Triangles For Rows
Row One: 3 full green triangles, 2 full contrast triangles, 1 left contrast print half-triangle and 1 right contrast print half-triangle.
Row Two: 3 full contrast print triangles, 2 full green triangles, 1 left green half-triangle and 1 right half-triangle.
Row Three: 3 full green triangles, 2 full contrast triangles, 1 left contrast print half-triangle and 1 right contrast print half-triangle (same as row 1).
3. Stitch Triangles Into Rows
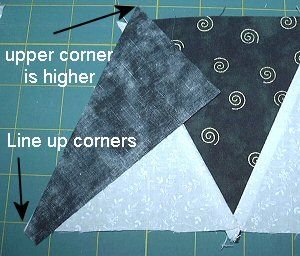
Tip on sewing points:
Sometimes when you are laying out pieces with points, it seems that one side is longer than a side it must be sewn to. That is ok. Line up the lower points as shown below. The upper corner actually comes up a bit higher on the upper piece. Once sewn and pressed open, it will be exactly right. Sewing with points requires patience and practice. Remember to press after each seam! We will be adding a tutorial on sewing with points.
Refer to the following photos.
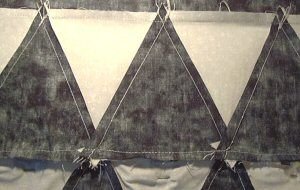
TOP ROW: Create the top strip of the pillow face by sewing, right sides together, the triangles - as shown in the drawing. You should have a half triangle of contrast fabric on each end, with three green triangles and two contrast triangles in the top row. Set aside strip.

MIDDLE ROW: Create the middle strip by sewing triangles and half triangles together, with a green piece on each end. The diagram shows the tree trunk already in place; you will add yours after each row is completed.

BOTTOM ROW: Create the bottom strip in the same way as the above two strips. The diagram shows the tree trunk already in place; you will add yours after each row is completed.

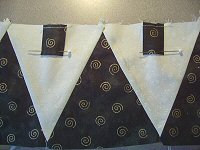
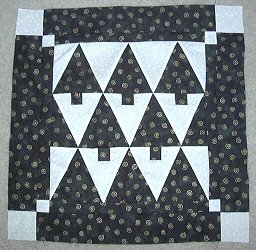
4. Add Tree Trunks
Iron under 3 sides of the trunk. Place the trunk right side up on a contrast fabric full triangle, with the top of the trunk against the edge of the fabric. Baste the trunk to the triangle, close to the edge. Press. Hand stitch or topstitch around the trunk. Refer to MIDDLE ROW and BOTTOM ROW directions above for placement of tree trunks.
5. Stitch Rows Together
Sewing right sides together, stitch your three rows together. NOTE: the photo shows the trunks now yet stitched down. You can stitch them into place in step 4 or after the rows are stitched together in step 5.
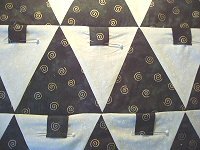
6. Add Top & Bottom Borders
Sew one 12.5" x 1.5" Border piece to the top of your pillow front, right sides together. Press seam open. Sew another Border piece to the bottom edge. Press seam open.
7. Add Side Borders
With your two remaining Border pieces, do the following: stitch a corner square to each end. Then stitch one border (with corners) to one side edge of the pillow front. Sew the last border (with corner squares) to the opposite side edge of the pillow front. Your pillow front should now measure 14.5" x 14.5".
8. Add Flange To Pillow Front
The flange on the front of the pillow is added the same way as the border. Sew one 14.5" x 2.5" green strip to one pillow front edge, right sides together. Repeat on an opposite side. Then, stitch a contrast fabric square to each end of the two remaining ruffle strips, right sides together. Stitch those strips onto the pillow block.
9. Make Pillow Back Pieces
To make your pillow back, hem one long edge of each pillow back piece in the following way: turn under one long edge 1/4"; press; turn under 1", press, stitch hem.
Lay out your pillow back right side up, with the hemmed edges toward the center. Overlap the hemmed edges so that the pillow back measures 14.5" x 14.5". Pin and baste the sides with the overlapped edges. NOTE: I like to put the smaller piece toward the top of the pillow, on top of the larger piece.
Add the flange pieces to the pillow back the same way you did on the pillow front.

10. Assemble The Pillow
Pin the pillow front and back together, right sides together. Stitch around the outer edge (using a 1/4" seam). Turn the pillow covering right side out (through the envelope back opening). Press. Pin in several places on all four sides along the seam at the base of the ruffle (flange). Then, on the front side of the pillow "stitch in the ditch" on the seam line along the base of the flange. If your pillow back and front pieces are lined up correctly, with the top flange seam right on top of the back flange seam, and you stitch in the ditch through both front and back pillow pieces, your stitching will not show on either side. The stitching will be right on the seam on both sides of the pillow. You might want to hand baste with contrasting thread before machine stitching to ensure proper placement.
Place 14" pillow form inside your beautiful new pillow cover.

Pillow Patterns


Sewing & Craft Projects for the holidays
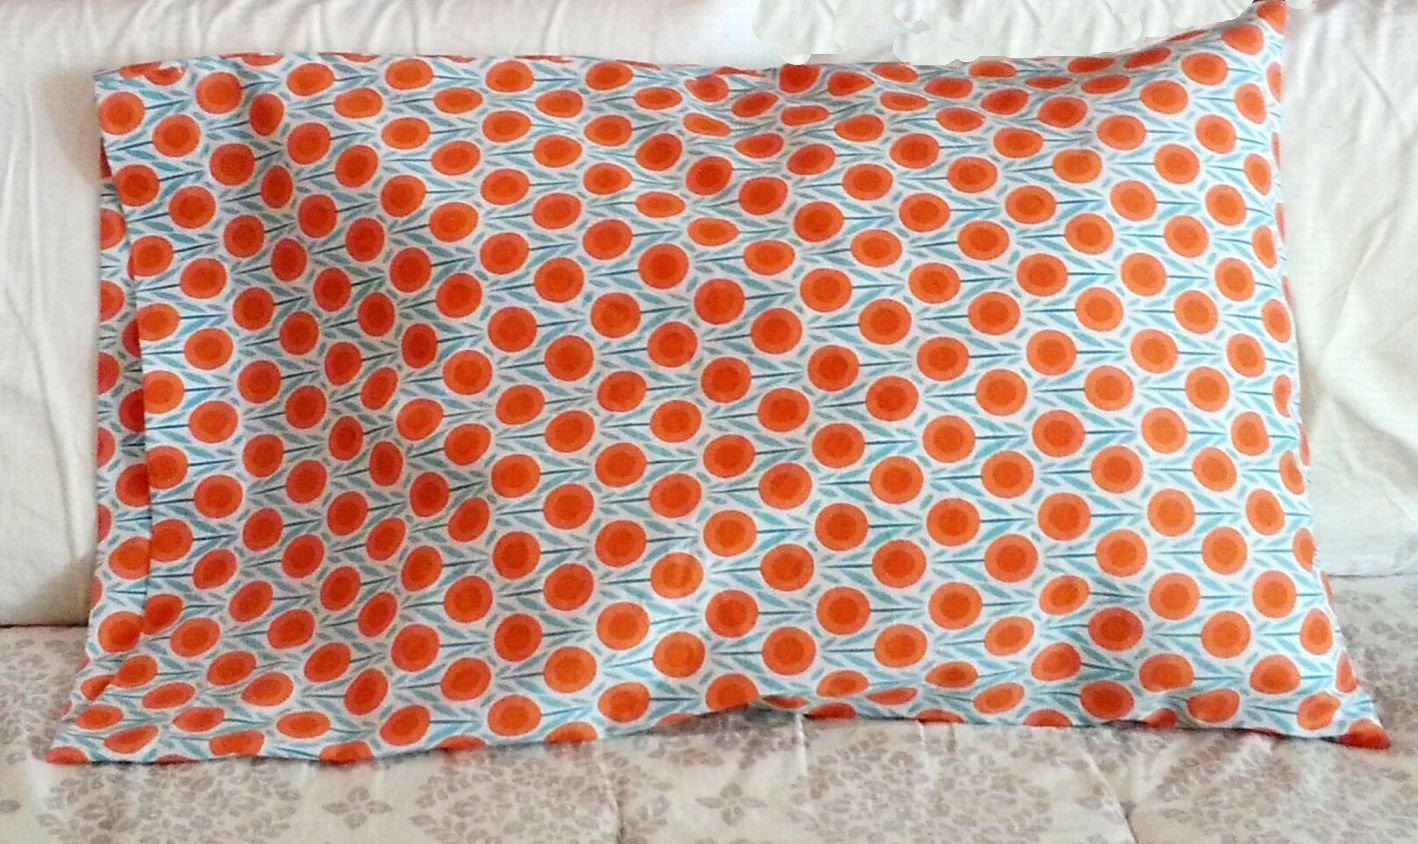
Nicely constructed pillowcase with contrast cuff and piping trim. Cuff is nicely finished on the inside. Free sewing pattern with directions for standard, queen and king.