|
|
|
|
| HOME SEW CRAFTS SHOP |
|
CORNER WINDOW DRAPES
|
| lessons holiday patterns sewing patterns |
-> sewing patterns -> home decor
Valance & Panels
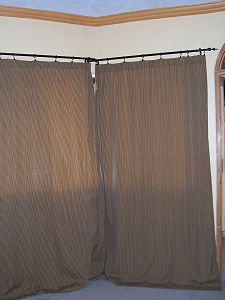
Drapes for wrap around windowsWorks well with overlap rods or a corner rod Also see: home decor Windows that wrap around a corner can be a challenge when it comes to creating nice looking curtains or drapes. This problem can be handled with overlapping curtain rods OR a corner rod (a rod that bends at the corner). This project uses overlapping bars. Either way, these easy-to-make drapery panels will look beautiful. No gathering or pleats. These unlined drapery panels are quick and easy, yet add elegance and style to any room. |
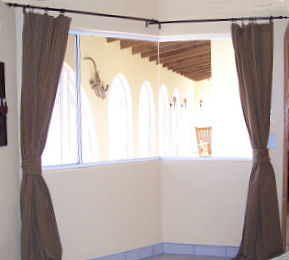
Measure Your WindowMeasure the distance from the place above the window that you want the drapes to hang from (photo below left), to the area below the window you want your drapes to hang to (photo below right). The drapes can hang all the way to the floor, plus "drag" a bit on the floor. How far above the window the drapes start, and how far they fall below the window is your choice. This number will be the basic length of the drapery panel, not including hems. Your overall length will consist of the height of the actual window, the distance above the window, and the distance below the window. If my window is 40" in height, the distance above the window is 5" and the distance from the bottom of the window to the floor is 24", I would use an overall panel length of 69". If I wanted a few inches of "drag", I would add about 3" to my length. My basic length would be 72".
Then, measure each window width (one window for each side of the corner). Measure from the distance outside the window where you want the curtain to come to, to the place where the corner edges will meet. This will be the basic width of each panel, not including hems. For our drapes, each panel came outside the window 2". For example, if the window measured 36" wide, I would use 38" as my basic width (not including hems). The panel would start right at the corner and extend out 2" past the edge of the window that is opposite the corner edge. Measure each window that meets in the corner because they might be different sizes. For our example here, we will assume each window is the same size. |
Cut Curtain FabricThese drapes lie flat when extended (pulled closed). They are "ruffled" only when open. There is no actual gathering or pleats in these drapes - this is why they are so easy to make (and why I love this style). At this point, all you have to do is decide how much hem you want on all four edges of the drapes. Our drapes have a 5" hem at the top and at the floor. Each side has a 1" hem. It's nice to have finished edges on hems, so allow an extra 1/4" for each hem. For example: each panel for our set would be cut 40.5" wide. This is because my basic width is 38". I am adding 1.25" for each side hem (1" for the hem and .25" to turn under on each hem), and there are two sides. I need to add 2.5" to the basic width to allow for side hems. Each panel for our set would be cut 82.5" in length. This is because my basic length is 72". I am adding 5.25" for each hem - top and floor (5" for the hem and .25" to turn under on each hem). I need to add 10.5" to the basic length to allow for top and bottom hems. Therefore, I would cut two panels. Each panel would be 40.5" x 82.5". |
Sew PanelsFor each panel, press under 1/4" on each long side. Press under 1" on each side; topstitch hem. Press under 1/4" on top and bottom of each panel. Press under 5" on top and bottom of each panel; topstitch hem. |
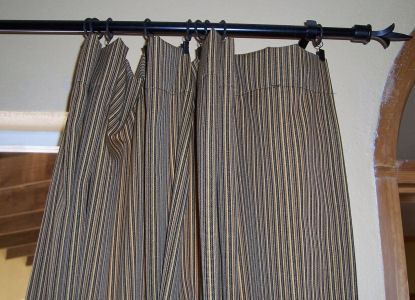
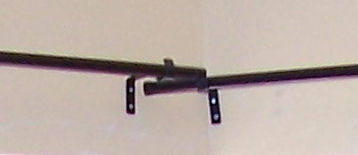
Hang Your New PanelsAttach drapery rod hardware to wall. Our outer brackets were 2" outside the outer edge of each window. The rods will overlap in the center - at the corner. Note: one bracket will lie a bit under the other, but the eye does not pick this up. The drapes will appear straight (of course if someone were to really study the upper corner they might see it, but I don't really think that will be a problem).
|
|
|
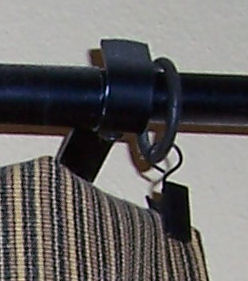 Use ring/clips to attach the drapery panel to the rod.
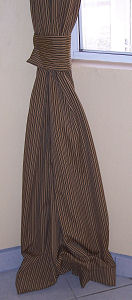
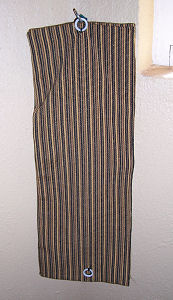
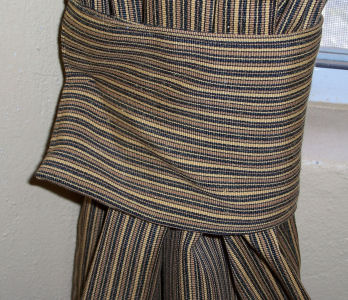
Create Tie-backsDecide what width and length you want for each tie back. Open your drapes and wrap a tape measure around a panel to determine the proper length. If you want each tie-back to be 24" x 6", cut a piece of fabric 25" x 13". Fold the fabric lengthwise, right sides together. Stitch across one end and one side, using a 1/2" seam allowance. Trim seams; turn right side out. Press under open end 1/2". Topstitch around all four sides. Attach a ring on each end and a small hook on the wall.
|
Quick Reference |
Learn To Paint!free video tutorialsVisit my youtube channel. Free videos with step by step instructions. Paint beautiful paintings for your home. |

Please ShareI rely on advertising to keep my site free. Please share with friends. |
Privacy Policy & Terms Of UseBy using our website, you expressly consent to our Privacy Policy and Terms & Conditions. All Patterns, images and instructions are copyright protected. |