|
|
|
|
| HOME SEW CRAFTS DECOR SHOP |
|
MAKE IN A DAY LINED DRAPES
|
| lessons holiday patterns sewing patterns |
-> sewing patterns -> home decor
|
Lined drapes in a day!Donated by: Jennifer Thoden (of SimpleSewingProjects - site not active as of Feb 2019) Also see: home decor |
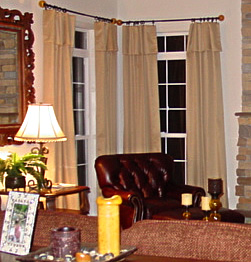
Why make drapes?I was sick of my plain windows. I had all the right furniture in the room, but nothing on my windows. Here's the dilemma. I am moving to Texas in a few months... so whatever I decided to make had to be versatile enough to use on the windows in the house in Texas. So, I didn't want to make something so tailored that I couldn't reuse the fabric. I also didn't want to spend too much time on this project. After all, I'm only going to be in the house for a couple more months. What I came up with was simple, but beautiful drapes that were super easy to make. And I'm going to show you how! I made a total of 8 panels... 2 per window. I averaged 2 Panels a night. So, you could easily dress up a window in a day. DirectionsThe rods cost me $25 each... totaling $100. The fabric on sale cost me about $300. I was able to give my room softness, drama, color and a designers touch for less than $500. These would have cost close to $4000 if I had a professional design and make these for me. So, here's how to make them. Step 1. Install your curtain rods. Install these first and hang the rings you're going to use. Step 2. Measure from the bottom of the curtain ring to the floor. Subtract 1/4". This is your finished length. Step 3. You will use the full width of your fabric for the width of your panel. Step 4. Cut your fabric and lining: Cut fabric width = full width of fabric (trim off the selvage if the fabric doesn't lie smooth and flat) Cut fabric length = finished length + 10" (bottom hem) + 14" (heading) Cut lining width = fabric width - 3" Cut lining length = finished length + 4" (bottom hem) + 2" Step 5. Sew the bottom hems
|
 Fold the bottom edge of the fabric up 5" and press.... fold up another 5" and press. Pin. Sew with a blind hem stitch. You can also sew the hem in place with a straight stitch.
|
|
 Fold the bottom edge of the lining up 2" and press... fold up another 2" and press. Pin. Sew with a blind hem stitch. You can also sew the hem in place with a straight stitch.
|
Lay the fabric right side up Lay the lining right side down so that the bottom edge is 1" above the bottom edge of the fabric. Align one side edge... pin and sew together with a 1/2" seam. Repeat on the other side. |
 Step 6. Sew the lining and fabric together
|
|
 Turn the drape right side out. Your fabric will fold over to the lining side about 1 1/2". Carefully press the drape so that the fabric is even on both sides of the lining. Pin in places to keep the layers from slipping.
|
Step 7. Lay the drape lining side up.
|
 Step 8. Fold in the raw side edges of the fabric at the top of the drape and pin. Stitch in place with a straight stitch
|
Step 10. Lay the drape lining side up again Step 11. Measure from the bottom edge up the finished length and mark with a couple pins |
 Step 9. Tuck the raw edges of the fabric at the bottom corners of the bottom hem... and stitch the bottom corners in place.
|
Step 13. Stitch the top edge to the drape along the pinned measurement in step 11 |
 Step 12. Fold the top edge down to the lining side so that the top edge is about 1" past the pins you just placed. Pin the top edge in place
|
Step 15. When you hang the drape, the fabric will fold over to the front. Arrange and fold the fabric as desired. |
 Step 14. Clip or sew the curtain rings to the drape along the stitched line
|
And there you have it! Gorgeous, professional quality lined drapes that can add some serious class to any room. You can sew formal draperies with silk fabric and a tassel fringe along that folded over edge. Or you can have more casual drapes like the ones in the photo.
|
Quick Reference |
Learn To Paint!free video tutorialsVisit my youtube channel. Free videos with step by step instructions. Paint beautiful paintings for your home. |

Please ShareI rely on advertising to keep my site free. Please share with friends. |
Privacy Policy & Terms Of UseBy using our website, you expressly consent to our Privacy Policy and Terms & Conditions. All Patterns, images and instructions are copyright protected. |