| HOME SEW CRAFTS DECOR SHOP |
|
FACE MASK
Sewing Pattern |
| lessons holiday patterns sewing patterns |
-> sewing patterns -> medical
|
These masks are quick and easy to sew, and require only straight stitching and basic sewing and cutting skills. They could be hand stitched, if a machine is not available. They are also reversible. I include instructions for ties or elastic. |
Fabric For MasksI used good quilter quality cotton. Quilting cotton is comfortable, and has a tighter weave than inexpensive cotton, providing more protection. The cotton is fully washable. I recommend washing and drying the fabric before use. Press out wrinkles. |
Supplies (one mask)
Fabric: Two pieces of fabric, each measuring 6.5" x 9.5". One piece is the outer layer; the other is the inside. I used white for the inside (facing the face). The mask is reversible, so use your choice of colors and prints.
TO CREATE TIES: Cut four fabric strips, each measuring 1.5" x 18". Iron under 1/4" along each long side. Fold the fabric in half, the long way, right side out. Press. Top stitch along the long, open side, close to the edge. Turn the tie over to be sure you have stitched through all layers. Note: a bias tape maker can make the folding easier. As an alternative, you can use ready-made bias tape. I made several masks, so I made my own ties.
Other
|
DIRECTIONS - all seams are 1/4"
2. Cut two pieces of elastic, each measuring 7". OR (for ties) follow the directions above. |
|
Pin the 4 corners securely, holding elastic or ties in corners. |
|
Turn right side out. Press. There will still be the open, unstitched area on one long side that you used for turning the mask right side out - press those edges under. |
|
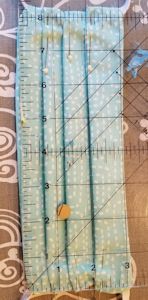
Use pins to mark 1" from one long side. |
|
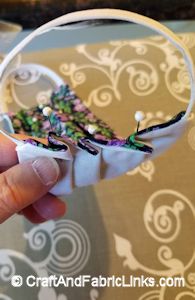
Pin the pleats so that each pleat is folded approximately 1/4". Then make a 3rd pleat in the center (between the first two pleats). Press. Your short sides should now measure 3". Refer to photos below. 6. Top stitch around all four sides. Sew a second stitch across each short end. |
|
|
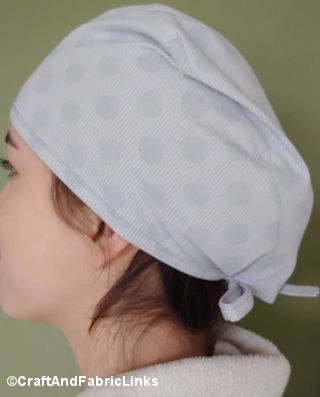
Related Project
Create a surgical cap for home or medical use. |
Quick Reference |
Learn To Paint!free video tutorialsVisit my youtube channel. Free videos with step by step instructions. Paint beautiful paintings for your home. |
Please ShareI rely on advertising to keep my site free. Please share with friends. |
Privacy Policy & Terms Of UseBy using our website, you expressly consent to our Privacy Policy and Terms & Conditions. All Patterns, images and instructions are copyright protected. |

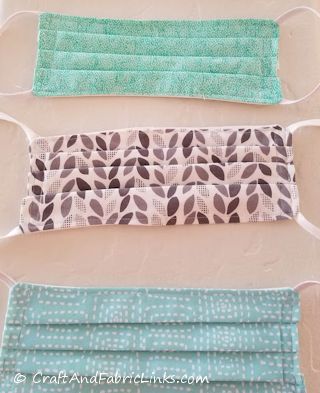 Sew face masks for yourself, friends and family, or health care workers.
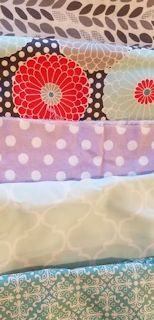 1. Cut two pieces of fabric, each measuring 6.5" x 9.5". I set out scrap quilting fabrics and chose fun, colorful fabrics.
 3. Place one piece of fabric right side up on your working surface. Place a strip of elastic on each short side, with the ends at the corners. Place the second layer over the first, right side down. If using ties, place a tie at each corner, so that one end is toward the corner of the fabric, and the other end runs to the inside of the layers of fabric.
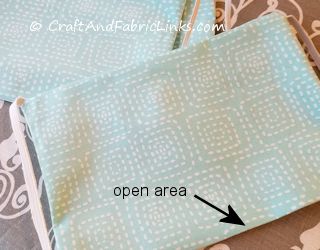 4. Stitch all 4 sides, leaving a gap for turning on one long side. BE CAREFUL - Make sure the ends of elastic or ties are securely stitched in the corners, but are not caught in the stitching elsewhere.
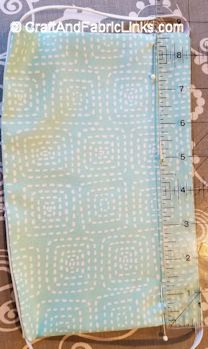 5. Create 3 pleats.
 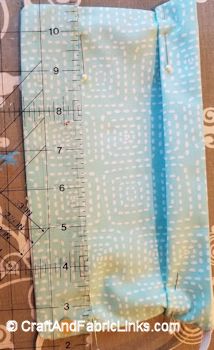 Use pins to mark 1.5" from the opposite long side.

 Surgical Cap