| HOME SEW CRAFTS DECOR SHOP |
|
SEDONA LANDSCAPE APPLIQUE page 3
|
| lessons holiday patterns sewing patterns |

|
Directions - continued from page 2All seams are 1/4"4. Create Inner Borders
Cut two 8.5" x 1" strips. Cut two 6.5" x 1" strips. Fold each border strip lengthwise, right side out. Press. Working on the right side of the background piece, pin short side borders to side edges of background piece, aligning raw edges. Stitch close to edge (approx. 1/8" from edge). Repeat with top and bottom strips. |
5. Create Outer BordersCut two 6.5" x 2.5" strips. Cut two 12.5" x 2.5" strips.
Square up your finished landscape block. The finished block should measure 10.5" x 12.5". The exact size is not important as long as all edges are straight and borders are of equal size. |
6. Add Free Motion EmbroideryAdd plant detail and tree branches by hand embroidery, fabric paint or marker or free motion machine embroidery.
|
|
PRACTICE on a scrap of fabric until you feel comfortable. It really is very easy! |
7. Add Hanging Sleeve / Assemble & BindHanging Sleeve
For more information on creating a hanging sleeve, go to: Hanging Sleeve Tutorial Assemble & Bind
|
Related Project
Decorate your patio or interior with colorful "no-care cactus". The cactus and ladybug are actually painted rocks! |
Quick Reference |
Learn To Paint!free video tutorialsVisit my youtube channel. Free videos with step by step instructions. Paint beautiful paintings for your home. |
Please ShareI rely on advertising to keep my site free. Please share with friends. |
Privacy Policy & Terms Of UseBy using our website, you expressly consent to our Privacy Policy and Terms & Conditions. All Patterns, images and instructions are copyright protected. |

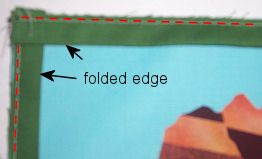 The inner border is created from a strip of fabric that has been folded lengthwise, and the fold is toward the landscape piece. The folded edge can be lifted from the finished piece. It is stitched on the raw edges only. This creates a nice effect.
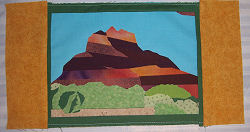 Pin the two side borders to the landscape block, right sides together. Stitch 1/4" from edges. Press. Repeat with top and bottom borders.
 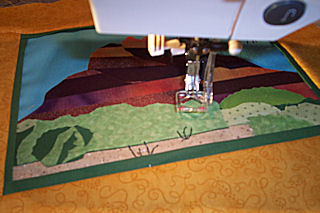 Free motion machine embroidery is actually very easy. It requires a darning setting on the sewing machine, and a darning foot. The feed dogs are lowered. Follow instructions for your machine. My machine has a setting for the presser foot that keeps the foot elevated (slightly off fabric). This allows "free motion" of the fabric. The needle simply goes up and down as usual, but the fabric is not fed by the feed dogs. You move the fabric around as the stitching occurs.
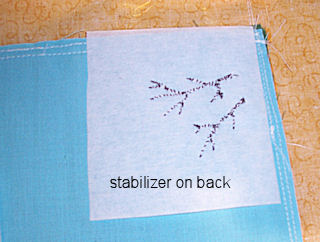 Using a washable fabric marker, lightly draw in the branches and small grasses etc. that you wish to embroider. Place stabilizer under your piece, in the area that will be embroidered. DO NOT OMIT THE STABILIZER. Stabilizer is necessary because it adds the correct body and thickness to the fabric being embroidered.
 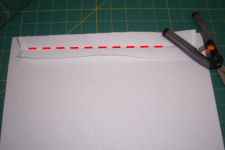 The photo on the right shows the unfolded sleeve being stitched along the fold line. To hang your finished piece, run a wood or metal dowel through the hanging sleeve and place the dowel ends in wall hooks.
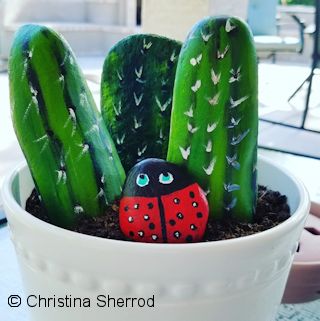 Painted Rocks Cactus Garden