| HOME SEW CRAFTS DECOR SHOP |
Free Sewing BookSewing Lessons For BeginnersChapter Five: Setting Up Your Sewing Machinepage 3 of 3 |

|
|
|
-> table of contents
|
Chapter 5 Page 3 Go Back To Page 1
Articles, images and patterns © Christina Sherrod of CraftAndFabricLinks.com unless otherwise noted.
|
Tension, Threading & BobbinTension refers to the force that is applied by the machine on your thread. You can also effect tension by the amount of pull or push you apply to the fabric as you feed it through under the needle - you should not apply force. Instead, just use your hands to guide the fabric through. Let the feed dogs actually feed the fabric through. There are two areas in which you can adjust tension. The upper thread (needle thread - coming from the spool) and the bobbin thread each have tension. featured pattern: cat applique Bobbin Tension |
|
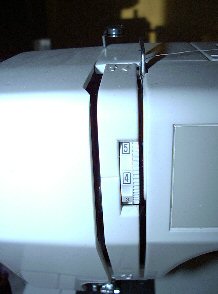
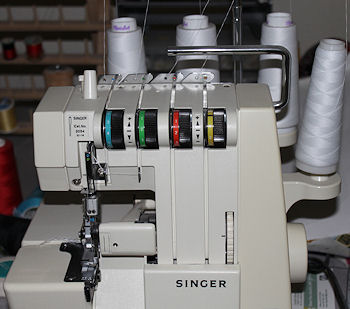
Check your own manual on this, also. With some machines, a screw is present which controls the bobbin tension. Usually, the bobbin does not need to be adjusted, and some machines do not even allow you to do this. In all of my time sewing, I have never adjusted bobbin tension. Needle Thread Tension This is the most likely place to find a problem. Generally the tension ranges from low to high in number, with high being the tightest. Check your own machine's manual for setting your tension. Too little tension can cause weak seams, which can be pulled apart easily. Adjust to a higher tension. Too much tension causes a seam that is too tight and causes your fabric to pucker. Adjust to a lower tension. When both threads have an even amount of tension, a smooth, "balanced" stitch is produced. The needle and bobbin threads are locked between the two layers of fabric with no loops on top or bottom and no puckers. Note on Tension Problems If your tension is wrong, and adjusting machine tension has not helped, the problem could be your choice of thread or needle. Too large of a needle can lead to skipped stitches. Needle breakage can occur if the tension is too high, but also if the needle is too small. If fabric is drawing up, it can mean the tension is too loose, but it can also be caused from a needle that is too large. Needle, tension, fabric weight and thread must all be considered when stitches are not of good quality. I usually start by re-threading my machine. Sometimes that is the only thing that is needed. Threading A Sewing Machine See your machine instructions for information on threading your machine. Machines vary as to how exactly they are threaded, but all have certain common features. The thread runs from the spool holder, through a tension device and down through the needle. The tension device controls the tension on the thread. It consists of a groove that the thread slides through. There are usually small grooves in the arm that holds the needle, for the thread to pass through. This holds the thread close to the needle arm. Refer to your machine manual for proper threading of your machine. The mechanism for setting the tension may be a dial or buttons (computerized machines). The first machine shown below is a regular machine; the thread runs from the spool to a hook at the top of the tension area, down the right groove and up the left groove, over a little hook and down the left groove again, and on to the needle. The dial is turned to set the tension. The second machine below is a serger. Sergers have multiple needles, each with its own tension setting device. A serger stitches the seam, trims and overlocks the seam allowance. Tension must be balanced between all the needles. A serger creates a stretch stitch, making it the perfect machine for sewing stretch knits.
|
|
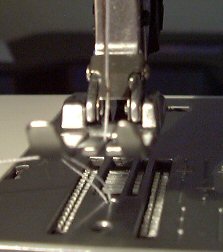
For most machines, the thread must be taken out of the needle in order to wind the bobbin. Newer machines allow bobbin winding without unthreading the machine - a real luxury! There is normally a bobbin holder on top of the machine. The thread runs from the spool through a sequence of hooks etc. that are specific to the type of machine and on to the spool. The needle is disengaged when the bobbin is winding. This is done automatically (when the bobbin is in position for winding) or manually, depending on the machine. After the bobbin is wound, the machine is re-threaded, the needle is engaged and the bobbin is placed in its area under the throat plate. Refer to your machine's manual for instructions on winding the bobbin. Once the bobbin is in place and the machine is threaded, gently turn the wheel of the machine while holding the needle thread off to the side (it should go from the needle under the presser foot and off to the side). This will bring down the needle. The needle will pass down through the throat plate and the needle thread will catch the bobbin thread and pull it up through the throat plate as the needle comes back up again. Page 3 Go Back To Page 1 |
Quick Reference |
Learn To Paint!free video tutorialsVisit my youtube channel. Free videos with step by step instructions. Paint beautiful paintings for your home. |
Please ShareI rely on advertising to keep my site free. Please share with friends. |
Privacy Policy & Terms Of UseBy using our website, you expressly consent to our Privacy Policy and Terms & Conditions. All Patterns, images and instructions are copyright protected. |

