|
|
| HOME SEW CRAFTS DECOR SHOP |
|
TROPICAL FISH WALL HANGING
Fish Block Three |
| lessons holiday patterns sewing patterns |
-> sewing patterns -> animals & pets
|
Pattern & InstructionsFISH BLOCK 3 of 4Return to INDEX OF BLOCKS / GENERAL INSTRUCTIONS Also see: Quilt Lessons |
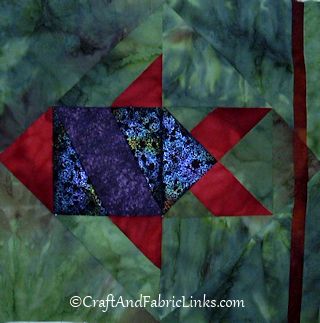
Fish Block 3Fish Block Three is the largest block in the wall hanging. Two center squares make up the main body of the fish. Outer triangles create the fins. A reed runs up beyond the tail of the fish. Measures 12.5" x 12.5" When all blocks are completed, go to Overall Layout so you will know where to place each block. |
| NOTE ABOUT PRINTING: Be sure your printer is set to print at 100%. If "Shrink to fit" or "Fit to page" etc. is selected, YOUR PATTERN PIECES WILL NOT PRINT TO THE CORRECT SIZE. Every pattern page lists one or more dimensions. CHECK YOUR PRINTED PATTERN FOR ACCURACY OF SIZE. |
|
PATTERN PIECES Our patterns download as pdf files. For instructions on downloading pdf files, go to: pdf instructions. |
Instructionsuse 1/4 " seam allowances; press between stepsIMPORTANT: Remember to square down all blocks and segments of blocks.
Press the reed piece seams open; then stitch the second water piece to the outer side of the reed. |
|
|
|
|
|
4. Stitch the nose of the fish to the body square (piece 4)
|
|
5. Create pieces 3A and 3B. NOTE: They are opposites. The photo below shows piece 3B
|
|
6. Cut one piece 4 from fish fabric and one piece 4 from water fabric. Stitch tail square together using fish piece 4, water piece 4, 3A and 3B.
|
|
|
|
|
|
9. Stitch the two halves of the fish together. Stitch striped trianges 7 and 8 to teh tail half of the fish. NOTE: The reeds of pieces 7 and 8 must line up with the reed in piece 6.
|
|
|
Quick Reference |
Learn To Paint!free video tutorialsVisit my youtube channel. Free videos with step by step instructions. Paint beautiful paintings for your home. |
Please ShareI rely on advertising to keep my site free. Please share with friends. |
Privacy Policy & Terms Of UseBy using our website, you expressly consent to our Privacy Policy and Terms & Conditions. All Patterns, images and instructions are copyright protected. |

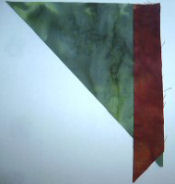 1. Create striped triangles #7 and #8. The photo at the right shows the placement of the reed, when stitching it right sides together with the water fabric.
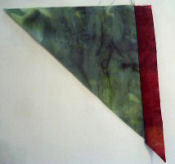 2. Create first body square. Lay out the pieces of square 5. Stitch the pieces together. Pieces are aligned as shown below on left when stitching together.
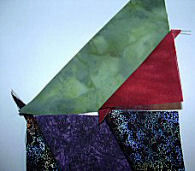 3. Create two striped trangles (piece 1). Stitch one triangle 1 above the body square, and one triangle 1 below the body square.
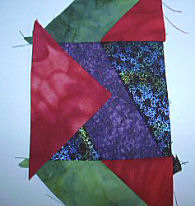
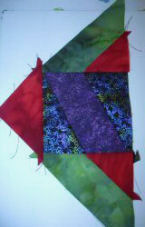
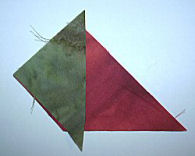
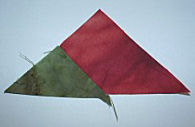
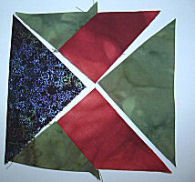
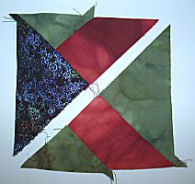
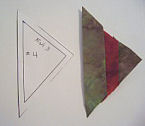 7. Create striped triangle 6. Lay out pieces. Stitch them together. Trim triangle 6 to fit pattern piece #4. Stitch triangle 6 to tail square.
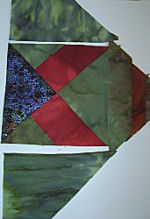 8. Stitch one piece 2 to the top of the tail square, and one piece 2 to the bottom of the tail square.
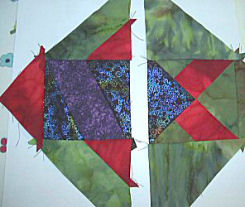
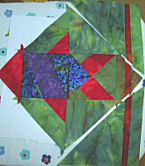
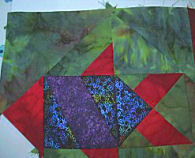 10. Stitch one piece 9 to the top of the nose half, and one piece 9 to the bottom of the nose half.
