|
|
|
|
| HOME SEW CRAFTS DECOR SHOP |
|
REVERSE APPLIQUE TREE
|
| lessons holiday patterns sewing patterns |

|
Reverse Applique Christmas TreeDesigner: Christina Sherrod
The cut edges of the ornament holes can be finished with a satin stitch or a hand stitched hem. The white fabric has been turned under and hand stitched around the tree. If you have never tried reverse applique before, I suggest you review my other two tutorials: |
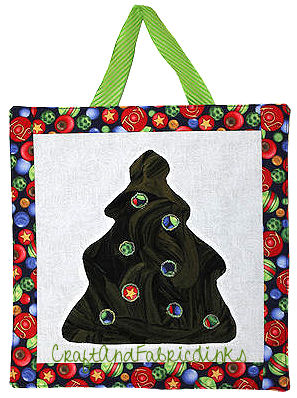 This pattern is called REVERSE applique because the design is layered opposite to regular applique. In this case, the tree ornament fabric is the bottom layer, the tree layer lies over that (with holes cut so that the balls show through), and the white background (with the shape of a tree cut out of it) is the top layer.
Size Of BlockOverall block size: 8" wide x 8" Make just one and use as a wall hanging, or make enough to create a Christmas Quilt. This block size is perfect for a hot pad, or my Quilt Block Apron. |
Supplies
|
 Fabric:
|
NOTE: If you prefer, you can use a cream color for the background, or sky color - or any color of your choice. I ended up choosing a "white starburst on cream" fabric. For my ornaments, I chose the border print. I was lucky - when I cut one of the ornament holes, it perfectly lined up with the star in the fabric below. A nice surprise!
General Supplies
Christmas Tree Pattern
The patterns will download as pdf files. Save the pattern to your own computer. Open the file on your computer and print from there. If you print from the browser, the size might not be correct.
If you need instructions on using pdf files, go to: All seams are 1/4" |
Instructions - for one tree blockPrepare Tree Pattern PiecePrint a tree pattern. Now, draw a new line that is 1/4" INSIDE the original tree outline. |
Trace Pattern To White (background) Fabric
|
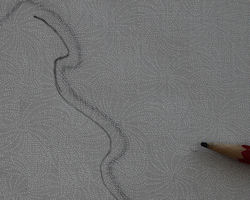 Lay your white fabric, right side up, over the paper pattern. Use a pencil to trace the INSIDE line of the tree onto the fabric (for this step, ignore the ornaments). It might be easier to tape the paper pattern and fabric to a window or other light source. See below if using dark fabric. The inside line will become your cutting line (and the pencil will not show when the project is finished).
|
Dark Fabric: If you are using a dark fabric and our pattern does not show through, cut out our Christmas tree from the paper pattern. Then cut off the outer 1/4" all the way around the paper tree. Place the pattern on your fabric and trace around it. |
Cut Out Tree
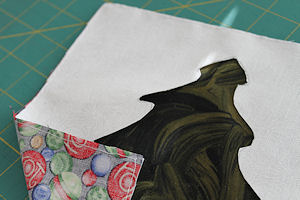
The image on the right shows the cut-out white piece placed over the green piece of fabric. |
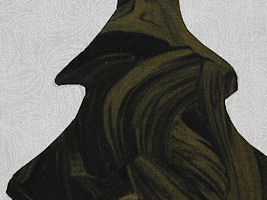 Cut out the tree shape from the background (white) fabric. Remember that this is reverse applique! The tree will be thrown away; the "scrap" is what we will use. Do NOT cut into the background fabric that is outside the tree; just cut away the tree.
Layer Your Fabrics
|
 Place RIGHT SIDES UP your fabric pieces as follows: red on the bottom, then green, then white on top. Hand or machine baste the layers together around the outer edge, close to the edge.
Finish Edge Of White Fabric (Hem)
|
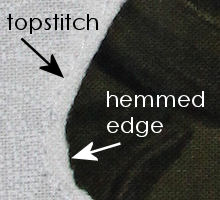 Carefully snip the corners and clip where necessary so cut edges of the white fabric will turn under (turn under approximately 1/8" to 1/4"). Turn under the edges and, using a tiny "invisible" stitch, hem under the edges. Topstitch around the outer perimeter of the tree (on the white fabric).
Cut Away Green Layer (to reveal ornaments)
|
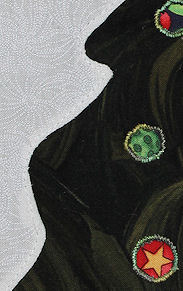
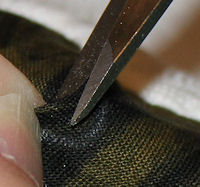 Using a fabric pencil, draw small circles on the tree to represent round ornaments. Very carefully cut away the green fabric where you have drawn the circles. Hint: pull the layers apart, then use small, sharp sewing scissors to make a good cut. Be careful not to cut through the bottom layer!
Finish The OrnamentsTo finish the edge of the ornaments, clip edges, then turn under and hand stitch a hem. OR use a satin stitch around the cut edge (this was the method I chose). |
Finish The BlockStitch one 8.5" border stripto top of the layered square. Stitch another 8.5" border strip to the bottom of your layered square. Then stitch a 10.5" strip to each side of the square. You now have a 10.5" x 10.5" block (this would make a 10" square finished quilt block) |
Wall Hanging
|
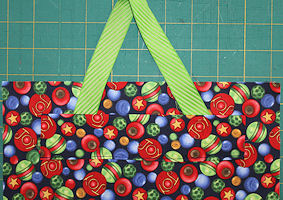 If you wish to create a wall hanging, cut a piece of batting and back fabric 10.5" sqaure. I chose a 3/4" wide ribbon as my "hanger" (cut to about 9" long).
Wall HangingSince my piece was going to hang on the wall, I did not use batting. It is a small piece and I felt batting was not needed. I stitched the back and front pieces right sides together (being careful to keep the ribbon out of the way and leaving an area open for turning. I then turned the piece right side out through the opening, and then topstitched around the entire piece. For illustrated instructions on Assembling and binding, go to: Assemble & Bind Quilt. For illustrated instructions on attaching a hanging sleeve, go to: Attach Hanging Sleeve. |
Sewing Hint
This photo is of a different project. The white layer is the top layer. The cut edge of the white fabric is being hand stitched under. |
 With reverse applique, upper layers are cut to reveal lower layers. The cut edges are turned under and hand or machine stitched. I usually hand stitch and then machine stitch. Using a contrast color thread for machine stitching adds a nice effect for some projects.
Quick Reference |
Learn To Paint!free video tutorialsVisit my youtube channel. Free videos with step by step instructions. Paint beautiful paintings for your home. |

Please ShareI rely on advertising to keep my site free. Please share with friends. |
Privacy Policy & Terms Of UseBy using our website, you expressly consent to our Privacy Policy and Terms & Conditions. All Patterns, images and instructions are copyright protected. |