|
|
|
|
| HOME SEW CRAFTS DECOR SHOP |
|
DIY LUMPECTOMY BRA
|
| lessons holiday patterns sewing patterns |
-> sewing patterns -> medical
|
NO SEW!Page 2: lumpectomy prosthesis sock coverGo to Page 1: full prosthesis cover (mastectomy) Any bra can be a mastectomy bra!Also see: Clothing Patterns |
The Problem With Lumpectomy BrasLet's face it - there are not many bras to choose from when searching for a mastectomy bra. There seems to be NO bras for lumpectomies. Plus the prosthesis choices are not good. I had already helped a friend with her problem with full mastectomy bras. I was mentioning it to another friend, and she passed onto me this wonderful method of creating a prosthetic unit for lumpectomies! The best part? You can USE ANY BRA OF YOUR CHOICE, you DO NOT NEED to purchase an expensive prosthesis, and NO SEWING NECESSARY. Wow! If you have a prosthesis you like, and wish to sew a cover for it (so you can easily move it from bra to bra and wear it comfortably), go to Page 1: DIY Mastectomy Bra. |
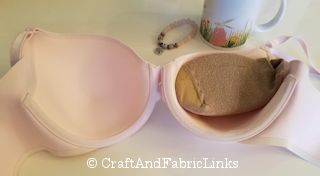
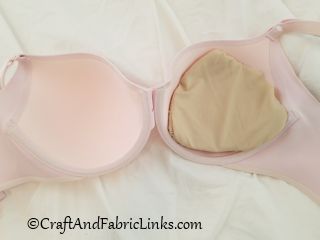
LUMPECTOMY PROSHTHESIS & COVERSimply use a bust enhancer and sock. |
Item SizeCustomize to your needed size. |
Supplies
bra stretch sock rotary cutter or scissors pins measuring tape or ruler |
 bust enhancer set (refer to photo): choose a larger size if needed, depending on the lumpectomy size. This is not merely a push-up; it needs to fill the area that was removed. My friend purchased a box of two, on sale, for $25. Much better price than a prosthesis!
InstructionsRead through all directions completely before starting the project.
|
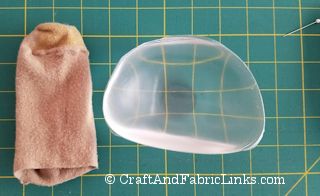 1. Assemble supplies.
|
|
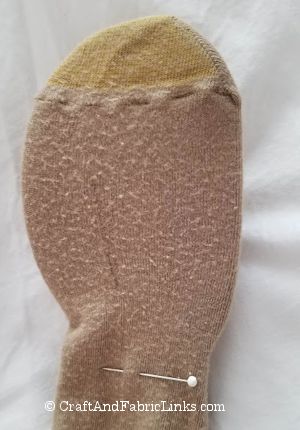 2. Place the enhancer inside the sock. Mark a pin just past the end of the enhancer. This will be the cutting line.
|
|
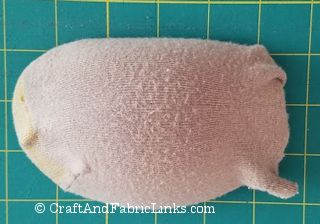
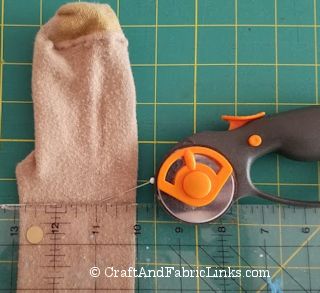 3. Remove the enhancer from the sock. Cut a straight line across the sock where the pin is, cutting through both layers. Do NOT cut the enhancer - be sure to remove it before cutting.
|
The image shows the front side of the sock-covered prosthesis. Place your new prosthesis and cover into your bra (wherever it is needed). The sock can be washed, and the unit can be moved easily from bra to bra. NOTE: If the unit slips out of place: put the bra/sock into the bra where it is needed. Stitch tiny cross stitches along the edge where the bra meets the sock. DO NOT stitch the open end of the sock. |
 THAT'S IT - all done!
Related Project
Hand stitch a cover for your prosthesis. Transfer the prosthesis from bra to bra. No special, mastectomy bra necessary. |
 DIY Mastectomy Bra
Quick Reference |
Learn To Paint!free video tutorialsVisit my youtube channel. Free videos with step by step instructions. Paint beautiful paintings for your home. |

Please ShareI rely on advertising to keep my site free. Please share with friends. |
Privacy Policy & Terms Of UseBy using our website, you expressly consent to our Privacy Policy and Terms & Conditions. All Patterns, images and instructions are copyright protected. |